Sunday, October 27, 2013

Pumpkin Puppy Treats

Hurray for fall! I love the changing colors of the trees and the cool, crisp mornings. But most of all, I love baking with PUMPKIN! (And drinking pumpkin spice lattes, of course). There is just something about pumpkin flavor that makes it feel like fall. 

I came across a recipe for Pumpkin Pie Snickerdoodles on Pinterest that looked delicious, so I had to give them a try. (I forgot to take pictures). They were SOOOOO good. I will be making them again. Check out the recipe I used HERE.

Unfortunately (or fortunately, depending on how you look at it), I only had a giant can of pumpkin in my pantry and was left with extra after making the cookies. I couldn't just throw it away, of course, so I had to think of another use.

I had read somewhere that pumpkin was good for dogs, and since we recently got a puppy,


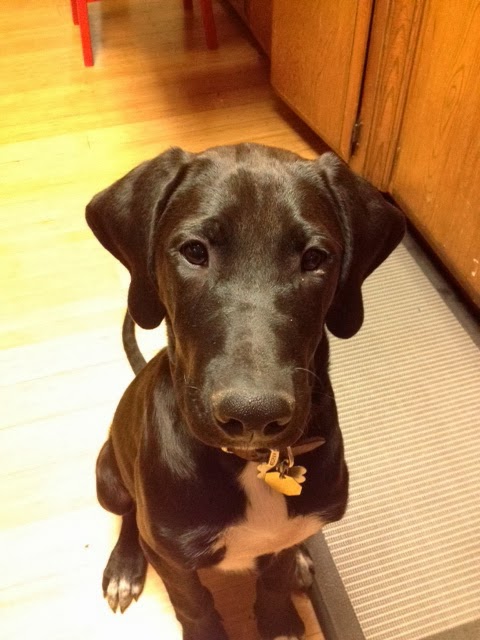
I decided to whip up some yummy treats for him too. Isn't he adorable?

I found a recipe for Pumpkin Dog Treats on THIS blog that sounded pretty easy. And I had all of the ingredients in my pantry already, which was a huge bonus. 

15 oz pumpkin puree
2 eggs
1/2 cup oats
3 cups whole wheat flour
2 Tbls peanut butter
1/2 tsp cinnamon

Mix it up, roll it out to 1/2 inch thick, cut out the "cookies," and bake at 350 for 30-35 minutes. 

A half hour later........ Voila!

Peanut Butter Pumpkin Puppy Treats!

I couldn't find my bone shaped cookie cutter, so we made diamonds instead. I don't think Benson (the dog) minded at all. He gobbled them up like crazy! I think he might like pumpkin flavor as much as I do. Good dog!

Friday, August 2, 2013

Mystery Vine

A few weeks ago, a plant popped up in my garden. I didn't put it there, and I didn't know what it was. But I was intrigued, so I watered it and let it grow. 

After a short time I could tell that it was a vine of some sort. Judging by the leaves and tendrils, I guessed it was some kind of gourd or melon, but I really couldn't tell for sure until the flowers came out. 


Finally, it bloomed!


As much as I liked the flowers, I was really hoping that it produced something that I could eat or use. After a quick internet search I determined that it was a Bottle Gourd vine. Yay! You can eat the gourds, drink the gourd juice, or let them mature and use them as bowls or noise makers (when they are dried up). How fun! I've never grown a gourd before, so I'm really looking forward to watching this one grow. You just never know what's going to pop up in your garden!

(I have not always been successful with my "experiments." Once I let a plant grow that ended up having super poisonous berries! That one gets ripped out as soon as I see it now. And just recently I let one grow that turned out to be a very aggressive weed! I'll be cutting it down today before it goes to seed.)

Blackberry Milkshakes

Blackberry bushes are a real pain. Literally! 

Every time I try to cut them back I am left with scrapes and scratches all over my arms and legs. Ouch!

Living where we do, we've got berry bushes popping up EVERYWHERE. It's a full time job just to keep them from taking over. This year, I noticed a ton of flowers on one set of bushes, so I decided to let them go for the summer before cutting them back. Boy was I rewarded! Every week my kids and I have been able to pick a large tub of big, sweet, juicy berries. For free! (Actually, I've decided that they are probably being watered by the leak in our pool, so I'm really paying to water them...... but it feels like free. Haha!)

 You can't really tell from this picture, but this is more than 5 cups of berries! This would cost about 20 bucks at the store!

We've been eating some of the berries straight off the vine, but I've been freezing most of them to use over the winter. I've also made peach blackberry crisp (SO YUMMY) and blackberry bran muffins (they were a little too dense so I need to tweak the recipe a little). And last night, we made blackberry milkshakes! Wow, were they delicious!


Aren't they a beautiful shade of purple? You'd think I added food coloring to get this color!


They were super easy to make, too. Put a few scoops of vanilla ice cream in your blender. Add a few handfuls of berries and some milk (a little at a time until you get a good consistency). That's it! I don't really like fruity ice cream, so I was surprised at how delicious they were. I will be making these again before blackberry season is over!

Saturday, July 20, 2013

So Many Plums!

I don't have any fruit trees..... yet. But I know people that do. And I've always heard that one tree can produce so much fruit that you can't possibly eat it all. And they are all ripe at the same time, forcing you to either give them away to friends and family, or can them. I was one of those lucky recipients this year. My mom gave me more than 20 pounds of plums. What am I going to do with 20 POUNDS of plums!?! 

Here are some of the things I made.

Plum Chipotle Jam 

If I'm going to eat jam, it's not going to be your average sweet sticky stuff. And my hubby is addicted to spice, so this recipe pleased him too. You can adjust the amount of chipotle to your taste. I got the basic plum jam recipe here and just added chipotle. They give you great instructions if you are not familiar with canning jam, so check it out. Here's my recipe:

3 pounds plums: washed, pitted, and quartered (leave the skins on for great flavor)
3 cups sugar
1 Tbsp lemon juice
1/4 tsp salt
3-4 chipotle peppers: diced
2-3 Tbsp adobo sauce from canned chipotle peppers


Put all of the ingredients in a stock over high heat and mash gently. Bring to a boil, skimming off the "scum" as needed. (Prepare you canning jars in boiling water).


Stir frequently until bubbles slow down and the mixture sticks to the spoon in clumps (The recipe says about 10-15 minutes, but it always take me more than 40 minutes).


You can remove the skins at this point if you want to, but I prefer to leave them in. They are so tender at this point that you almost don't notice them. Turn off the heat and divide jam among your hot jars, leaving 1/2 inch headspace. Wipe rims and finger tighten lids. Process jars in a hot water bath for 10 minutes (for 1/2 pint size jars). 

Spiced Plum Chutney
We used this chutney with pork and also at Thanksgiving with turkey. It was a hit! I found the recipe here, but I added more garlic and used dried cherries instead of currants (because that is what I had on hand). The process is pretty much the same as for the jam above, but it needs to cook longer to reduce the added liquids. Here is my recipe:

3+ lbs of plums (8 cups chopped): washed, pitted, and chopped
2 red onions, finely chopped
1 1/2 cups brown sugar
1/2 cup dried cherries, chopped
1/2 cup cider vinegar
6 cloves garlic, finely chopped
1 Tbsp mustard seeds
1 tsp salt
1/2 tsp fresh ground pepper
1/2 tsp red pepper chili flakes

Makes about 4 pints (or 8 half pints)


1. Prepare jars.
2. Put all ingredients in a saucepan over medium-high heat. Bring to a boil, reduce to a  
    steady simmer, and cook (stirring occasionally) until the mixture is reduced by a third 
    (30-40 minutes or longer).
3. Put chutney in jars and seal with lids. Process jars in hot water canner for 10 minutes. 
    Store for at least 6 weeks before serving for best flavor. Refrigerate after opening.

Plum fruit leather
This was a fantastic way to use the plums. Even my picky eater (who wouldn't touch a plum with a ten foot pole) gobbled it down. I'll be making them again, despite the long cooking time, because it may be the only way I get her to eat fruit! I found the basic instructions for fruit leather here. I used plums and peaches together and it was DELICIOUS!

This recipe is easily doubled, and I would suggest it because they are devoured in seconds!
All you need is fruit, water, sugar, lemon juice, and spices like cinnamon and nutmeg.

4 cups chopped fruit (I did 2 cups plums and 2 cups peaches) 
1/2 cup water

Bring to a simmer and cook over low heat for 10-15 minutes, until fruit is cooked through.
Taste mixture to determine sugar needed. Depending on the ripeness of the fruit, you will need to add more or less sugar. Add sugar 1 Tbsp at a time. I didn't add much because I like my leather to be a little on the tart side.  Add 1 tsp lemon juice to enhance the fruit flavor and add tartness. Add a few pinches of spices. I added cinnamon and nutmeg.

Continue cooking until thickened (10-15 minutes or more). Puree the mixture to make it smooth. I used a stick blender to do this. Adjust sugar and spices if necessary. 

Pour puree onto a lined baking sheet (using microwave safe plastic wrap or parchment). Make sure the lining hangs over the edge, but does not fold back over the puree. The mixture should be 1/8 to 1/4 inch thick. Bake at 140 degree Fahrenheit (or the lowest setting on your oven) for 8-10 hours. (Mine took much longer, but I think it was because my pan was warped that there was a spot that was too thick). The fruit leather is ready when the surface is smooth and no longer sticky. It will peel off the plastic quite easily.

To store fruit leather (if you have any left over after the kids and husband devour it), wrap it in plastic wrap and keep it in the refrigerator.


Nana's Dishcloth

Wow! It's July!! Where the heck did March, April, May, and June go??? Sometimes time flies by faster than I ever thought possible. But I'm really happy that it's summer. Summer schedule gives me the time to do a lot of the things I love, like gardening, canning, and knitting. So look forward to posts about my veggies (which are doing fantastic in their new location!).

This week's forcast is over 100 degrees for seven days straight, so I think I'll be spending most of my time next to the pool watching my kids swim. Although I won't get a lot of housework done, I will be able to catch up on my blog and get ahead on my knitting. Maybe I'll even start some Christmas presents so I won't be cramming at the last minute.....Yeah, right.

So, in honor of summer, and to make up for four months of no blog posts, I am giving you my favorite knitted dishcloth pattern! Yes, it's very basic, but I've tried many different ones and continue to return to this one (that I got from my grandmother) as the best. It's probably the same pattern that they give you free with some yarns, but to me it will always be Nana's Dishcloth.


(Yes, my dishcloths look a little wonky... but as soon as I wash them, they will be nice and square).

Nana's Dishcloth
100% cotton yarn (like "Sugar'n Cream")
Size 7 or 8 knitting needles (I like to use 16" circular, but any type is fine)

(This pattern starts at one corner, increases to halfway, and then decreases to the opposite corner)

Cast on 3 stitches.
Knit across.
Knit 1, Yarn over, Knit to the end. (Increase row)
**Repeat increase row until you have about 46 stitches (or the dishcloth is the size you like).
Knit across one time.
Knit 2 together, Yarn over, Knit 2 together, Knit to the end. (Decrease row)
**Repeat decrease row until you have 3 stitches left.
Knit across.
Cut yarn with a 6 inch tail, and using a yarn needle thread yarn through all three stitches.
Fasten off (weave tail into cloth to secure stitching)


Happy Knitting!

Tuesday, February 19, 2013

Caraway Pork and Peppery Beef

I'm not a bad cook, but if I don't have a recipe, I'm totally lost!

My husband, on the other hand, is one of those people who can throw a bunch of ingredients together without using any recipe. And everything he cooks makes you think "Oh wow! This is the best thing I've ever tasted!" (My only complaint is that he makes a huge mess in the kitchen that I have to clean up, LOL!)

Unfortunately, my hubby has to work a gazillion hours and the job of daily cooking has fallen to my shoulders. Luckily I can call him up and he can tell me what to put together over the phone. He is especially talented at thinking up seasoning mixes and marinades. 


Here are a couple that we've made recently...... (sorry, I forgot to take pictures!)

Caraway Pork Loin
2 Tbsp caraway seeds, crushed
1 tsp salt
1 tsp mustard powder
1 tsp mustard seed
1/2 tsp thyme
1/2 tsp oregano
1 Tbsp vegetable oil

Mix the ingredients and then liberally coat a 1 1/2 lb pork loin (it really doesn't matter what size loin you use..... if your is bigger, just increase the amounts of the ingredients to make slightly more rub). 

I use a pan that I can use on the stove and then put directly in the oven (but you can transfer from pan to oven safe dish if you need to).

Over medium/high heat, seer the pork loin on all sides (about 3-4 minutes per side). There is already oil on the pork, so you don't need oil in your pan. Transfer to a 325 degree oven for about 25 minutes (I can't really tell you how long it will be because it will depend on how thick your loin is. Use a meat thermometer and remove the pork when the thermometer in the thickest part reaches about 170 degrees). Remove the pork from the oven, cover with foil, and let rest 5-10 minutes. 

We enjoy this pork with rice, quinoa, or a green salad.


Peppery Beef Tri-tip
5 garlic cloves, chopped finely
2 Tbsp rosemary, chopped
2 Tbsp thyme
2 Tbsp dijon mustard
1 1/2 tsp salt
1 1/2 Tbsp black pepper
1/4 C olive oil

I used this amount for a fairly large Tri-tip. It's alway better to have extra marinade, so if you think your Tri-tip is extra big, you can increase the amounts listed. 

Combine ingredients and rub liberally over all sides of the Tri-tip. Seal in a ziplock bag and let sit in the refrigerator up to 2 days (the longer the better!) 

This beef is best on the B-B-Q, so I called in my husband (a.k.a. "master griller") to do the job. Cook to just UNDER your preferred doneness. Remove from grill, cover with foil, and let rest 10 minutes. It will continue to cook after you remove it. (You should ALWAYS let meat rest before you cut into it or you will lose all of the yummy juices!)

Slice up the meat and enjoy with rice and sautéed (or barbecued) veggies. Yum!!

Please comment and let me know if you try either of these recipes. I would love to hear how you liked it!


Friday, February 8, 2013

Spice-Rubbed Pork With Quinoa

I just wanted to share this delicious recipe I cooked this week. Based on a recipe I found on the Food Network a few years ago....


Ingredients:
2 tsp paprika 
1/2 tsp chipotle powder
1/2 tsp red pepper flakes
2 tsp ground cumin
2 tsp kosher salt

1 1/2 lb pork tenderloins, halved crosswise
1 Tbsp olive oil

1 cup quinoa, rinsed
2 cups water
pinch of kosher salt

1 cup frozen corn, thawed
1 can black beans, rinsed and drained
1/2 medium onion, sliced
fresh ground pepper

1 jar of salsa verde (I usually don't use canned salsa, but we had it, so I used it)
1 avocado

Directions:
Preheat oven to 425 degrees F. Combine first 5 spices above in a shallow dish. Rub the pork with the olive oil. (I forgot to do this and it still turned out great. So you can omit the oil if you want). Roll the pork in the spice mixture to coat. Transfer pork to a baking dish and roast covered in the oven until thermometer interred into the thickest part of the meat registers 145 degrees F. About 25 minutes, but will depend on the thickness of your tenderloin. Remove roasted pork from oven and let rest at least 5 minutes before slicing.

Meanwhile, put the water with a pinch of salt and the quinoa into a saucepan and bring to a boil. Turn heat to low and simmer for 15 minutes, or until the quinoa is transparent. Drain any excess water and fluff with a fork. Let it cool for 10 minutes and then toss it with the corn, black beans, onion, and fresh pepper.

Slice the pork. Serve with quinoa and sliced avocado. Pour salsa verde over pork and quinoa (the quinoa salad is a little boring without the salsa....). ENJOY!!

Sunday, January 20, 2013

Toy Hammock

I'm not sure why, but where there are kids, there is bound to be a stuffed animal (or 10) nearby. When you have a baby, people start buying them for you. And then your kids get older and they start ASKING for them on their birthdays and holidays.......leading to stuffed animal overload.

I have three kids. And that mean I have about a thousand stuffed animals in the house. (Ok, maybe not REALLY a thousand, but it sure feels that way).

I don't really mind that they want their little cuddly things, but I am SO tired of constantly picking them up and trying to find somewhere to keep them. If you put them in the toy box, you run out of room for actual TOYS in there. If you keep them on the bed, you have to move them every night and put them back every morning. Too much work for an already over worked mom, if you ask me. 

I know that there are those triangular netting-type things to hang in the corner of the room to store all the stuffed animals in......but if you ask me, they are kind of cheap looking and are bound to break in no time. Besides, they look kind of dorky. 

But I'm desperate. 

And also being frugal (Ok, cheap) I start thinking of how I could MAKE some hammocky-thingy to hang in their room that wouldn't look so bad. I must be able to use something I have already...... Fabric? Not stretchy enough. Oh, YARN! And thanks to the internet, a few clicks lead me to this forum which had a pattern in one of the responses. I added about 10 rows because I didn't feel like it was big enough, but otherwise made it according to the pattern listed.


All loaded up.... whoops! I was so excited to try it that I forgot to weave in the strings....

After loading up the hammock, I realized that one was not going to be enough to hold all of the cuddly animals. AND, now my son needs one for his room too. It's a good thing it's an easy pattern. Off I go to make another one.....

TOY HAMMOCK
7oz worsted weight yarn
size H crochet hook

ch 9, sl st in first st to make a circle. DO NOT TURN.
Row 1: ch 7, sc in circle, ch 5, dc in circle. TURN.
Row 2: ch 7, sc in first loop, ch 5, sc in next loop, ch 5, dc in same loop. TURN.
Row 3: ch 7, sc in first loop, ch 5, sc in next loop (repeat to end), ch 5, dc in last loop (this will be your second stitch in the last loop). TURN
REPEAT Row 3 for Rows 4-41 (or more if you would like to make your hammock bigger).
Last Row: ch 5, sc in first loop, ch 3, sc in next loop (repeat to end), ch 5, dc in last loop.
Fasten off and weave in ends.

Hang with hooks in the corner of the room at your desired height and load up with stuffies! Yay! No more teddy bears on the floor!

Tuesday, January 15, 2013

Bearded Beanies

Well, Pinterest hits again.....

I kept seeing bearded beanies (hats) show up on my page and I knew that I just HAD to make some for my family this year. I had a feeling that they would be funny. But I never dreamed that they would be such a hit! I managed to make them for my two nephews, my niece, my brother, and my daughter (though hers was a little different......see below).

I tried to match hair color and age of recipient so they would be as real looking as yarn beards could be.

Oh. My. Gosh. 

I still laugh when I look at the pictures!


My brother and nephew wearing their new beards.

While I was knitting and crocheting these gifts, my 4 year old daughter decided that she wanted one too. Now, Penelope is a very girly girl, so I was surprised to hear her request..... until she explained it more. It made perfect sense.

"Mom, can you make me one of those hats? But instead of a beard I want it to have pink lipgloss."   

DING, DING, DING! Great idea!!! I haven't seen any "lipgloss beanies" on Pinterest yet! I managed to tweak the beard pattern to be skin colored with lips. She was THRILLED! (Personally, I think it looks like she put too much lipstick on and went out of the lines....)


The kids with their "beards" (and my brother with his REAL beard). 

I think these were my favorite gift to give this year. I might just have to make some more..... 

(I will try to write out the instructions this week and add them here)

Friday, January 4, 2013

Clearing the Kitchen Sink Clog

As a person who likes to do everything myself, I never thought I would be doing plumbing. My husband is very good with all of the construction and maintenance of the house, and does most of it with me as a mere assistant to "hold the light here" and "get me a wrench" and "QUICK, turn off the water!" Needless to say, I haven't had to actually DO any plumbing myself. But I have watched him do a lot of different things. And that's a good thing, because now I know I CAN do basic plumbing if the need should arise. Again. 

Since we moved in our house (a year and a half ago) one of our kitchen sink drains (there are separate drains for each side of sink) has never drained well. I usually just try to avoid that side, but I finally got fed up with it. I decided to play plumber today and I took off the trap to see if there was a clog. The "trap" is the U-shaped pipe under your sink, for those of you who don't know). I cleaned out lots of gunk..... but not enough gunk to stop the water from flowing. So I decided to check the pipe that goes from the trap to the wall. OH. MY. GOSH!!!! I'm sure this thing has been clogged for YEARS. And let's just say it's a good thing I don't have a sensitive gag reflex! Seriously! That clog covered 95% of the pipe opening...... 


and this clog went ALL THE WAY TO THE WALL! More that 18 inches of solid blockage!!! How do you even CLOG a pipe like that??? One of the grossest things I have seen. Ever. (This picture doesn't do it justice... and it got even worse as I dug deeper and deeper into the pipe). But after a half an hour of digging and scraping with various tools (except for the actual pipe snake which I am afraid to use and will let my hubby do later) the pipe was as clear as it was going to get.


 I was trying to save Danny a job.... which I did. Sort of. While examining the pipe, I found that it is rusted almost all the way through and needs replacing (to avoid a WAY bigger disaster). So, add another job to HIS list, because I am not THAT savvy with the plumbing. LOL! But at least, for now, the water flows without pooling up in the sink..... Yay me! :-)